Using a Workspace
An integral aspect of creating a transformation is the development of the script itself. In Keboola, you can use SQL, Python, or R by default. To simplify the process of writing these scripts, we offer workspaces (see the full documentation of workspaces). Workspaces provide a secure development and analytical environment where you can interact with the data and develop your scripts with confidence.
-
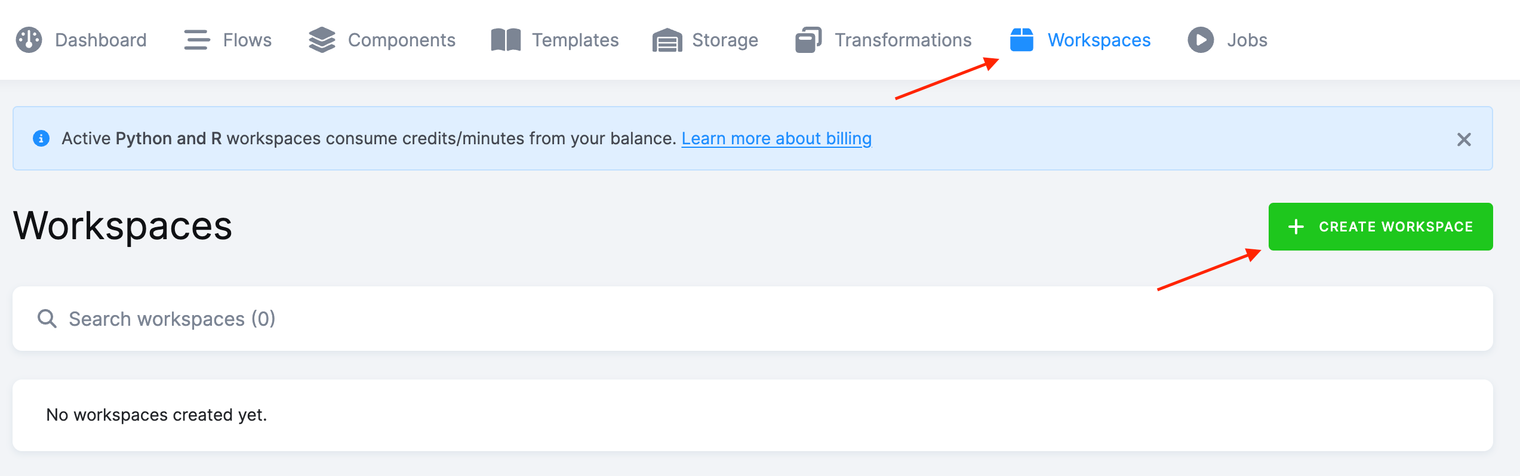
Navigate to Workspaces and click the Create Workspace button.
-
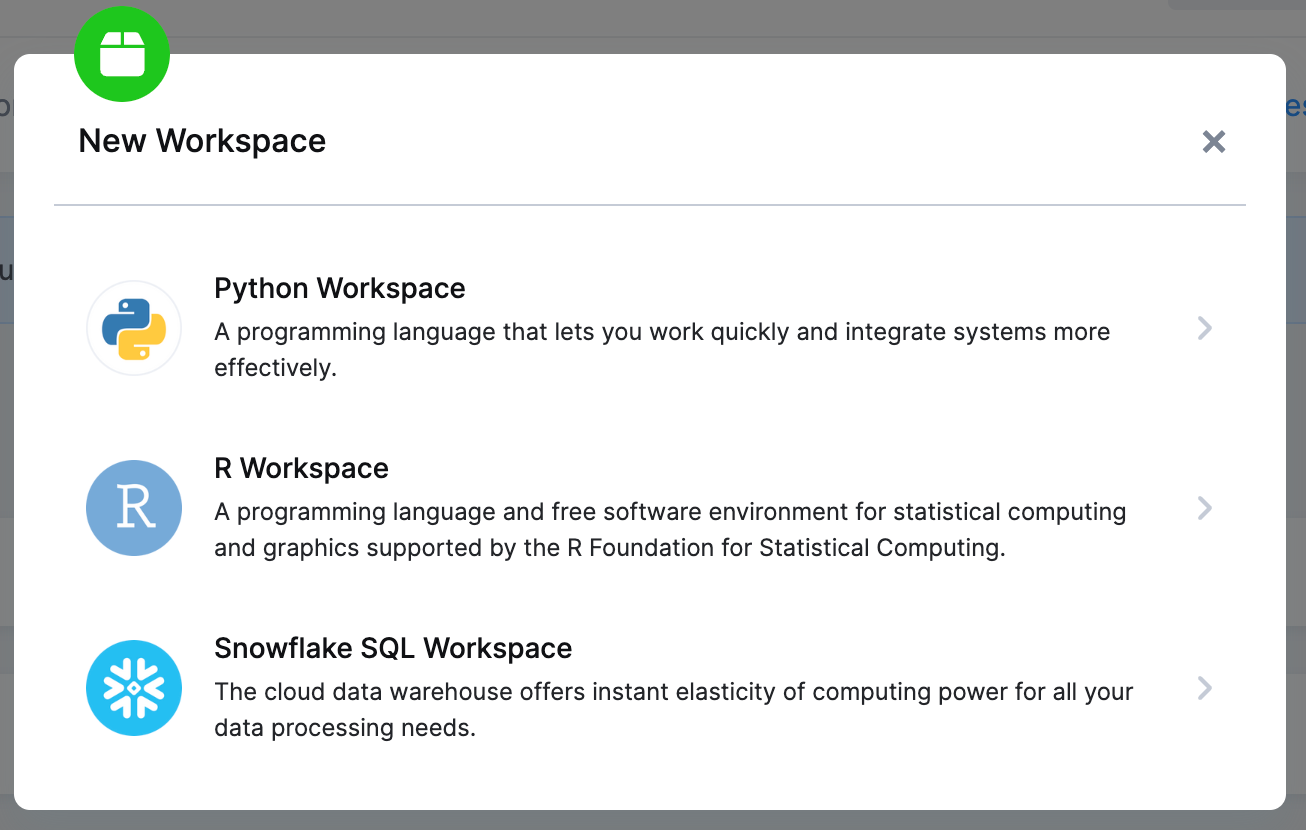
Select Snowflake SQL Workspace (or other SQL workspace depending on your project’s backend)
-
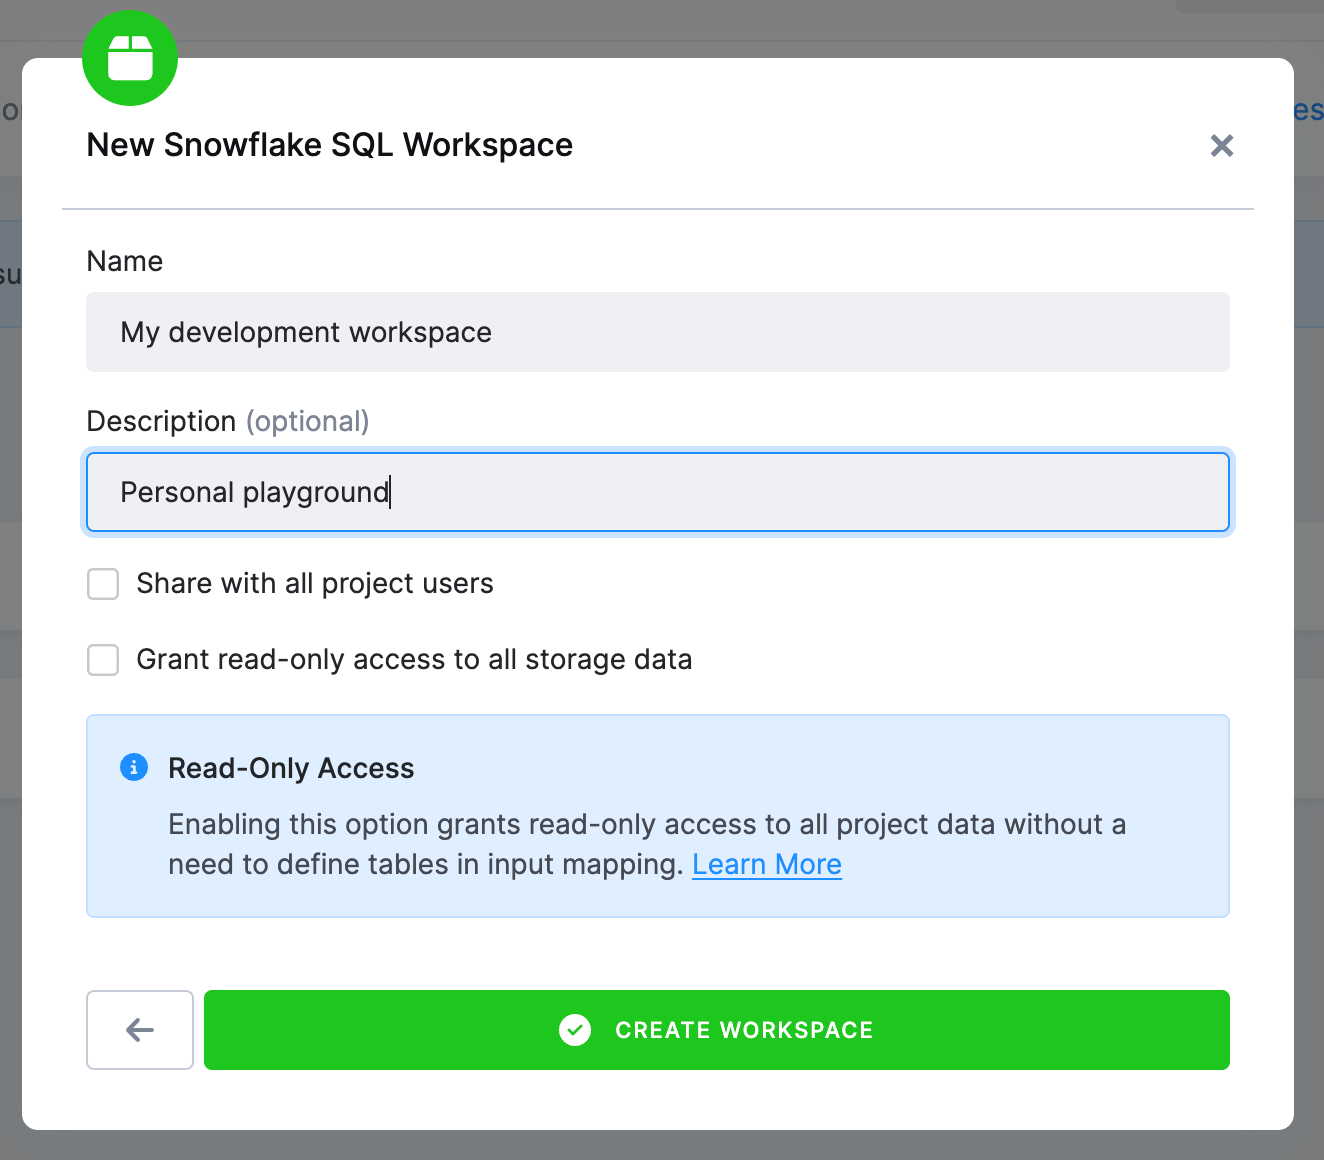
Enter a Name and a Description. Additionally, take note that you can grant access to the workspace, allowing other users to collaborate with you. Click Create Workspace.
-
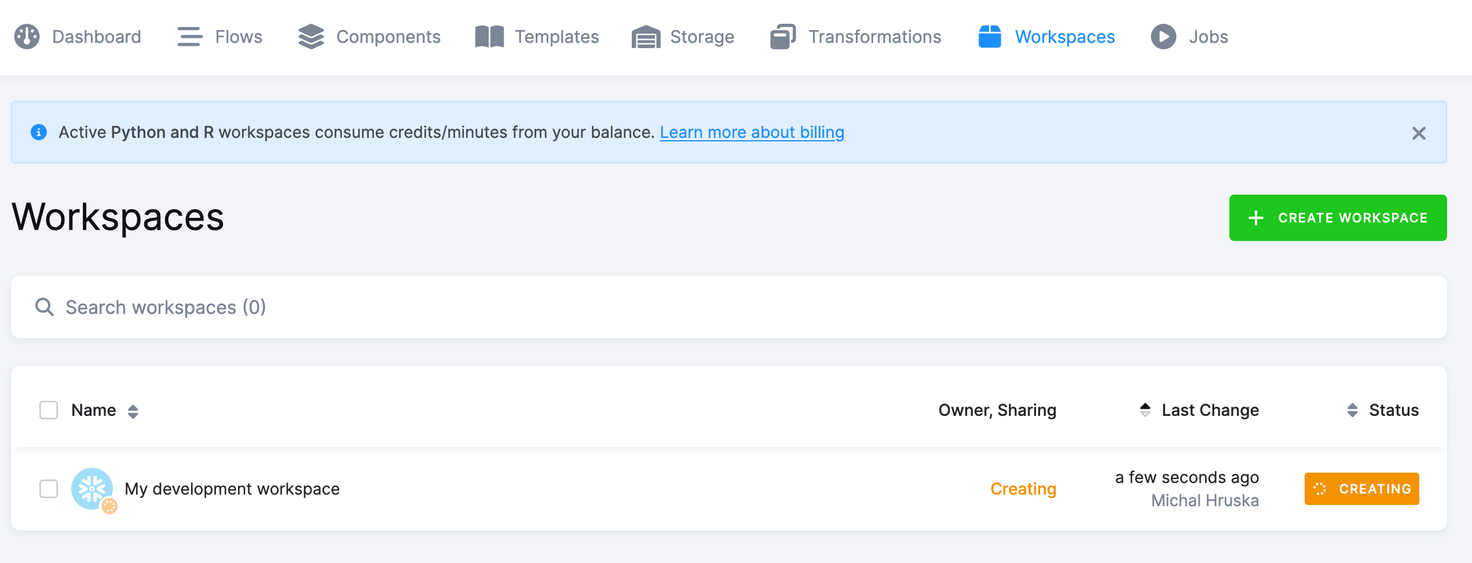
A creation job will initiate, and your workspace will soon appear among the configurations.
-
Click the workspace name to access the details.

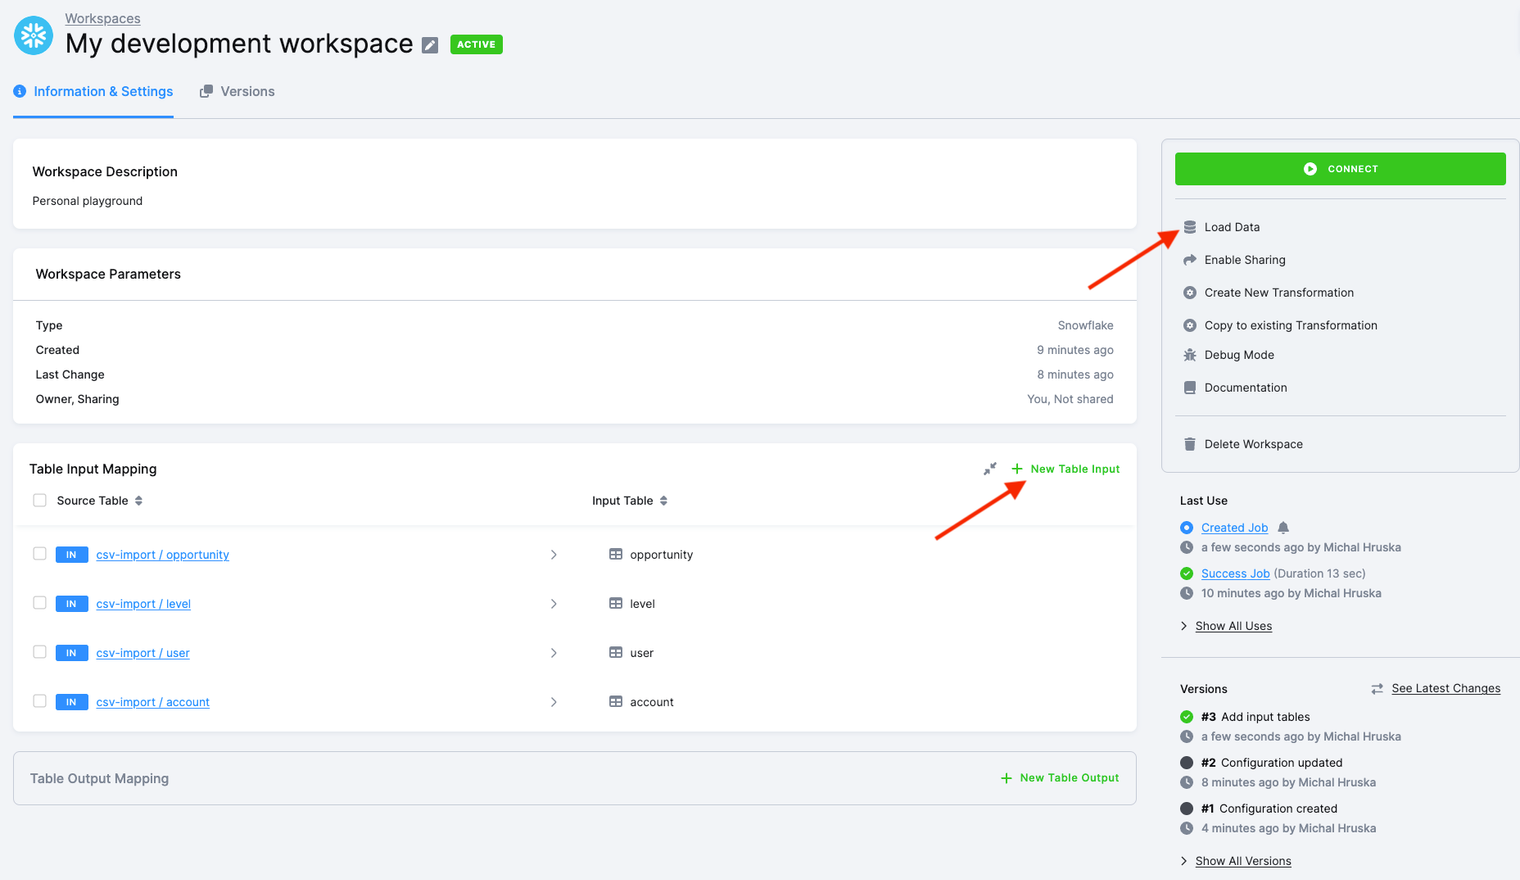
At the outset, you’ll need to configure the table input mapping, much like we did when setting up a transformation. Subsequently, click Load Data to clone the datasets from Storage to your workspace. The data will be cloned to your workspace in a state as of the moment of loading. To refresh the data in a Workspace, you need to click Load Data again.
If you wish to have read access to all data in your Storage without physically cloning it into the workspace, check the Grant read-only access to all storage data option when creating a workspace. However, this is a feature we won’t delve into in this tutorial.
-
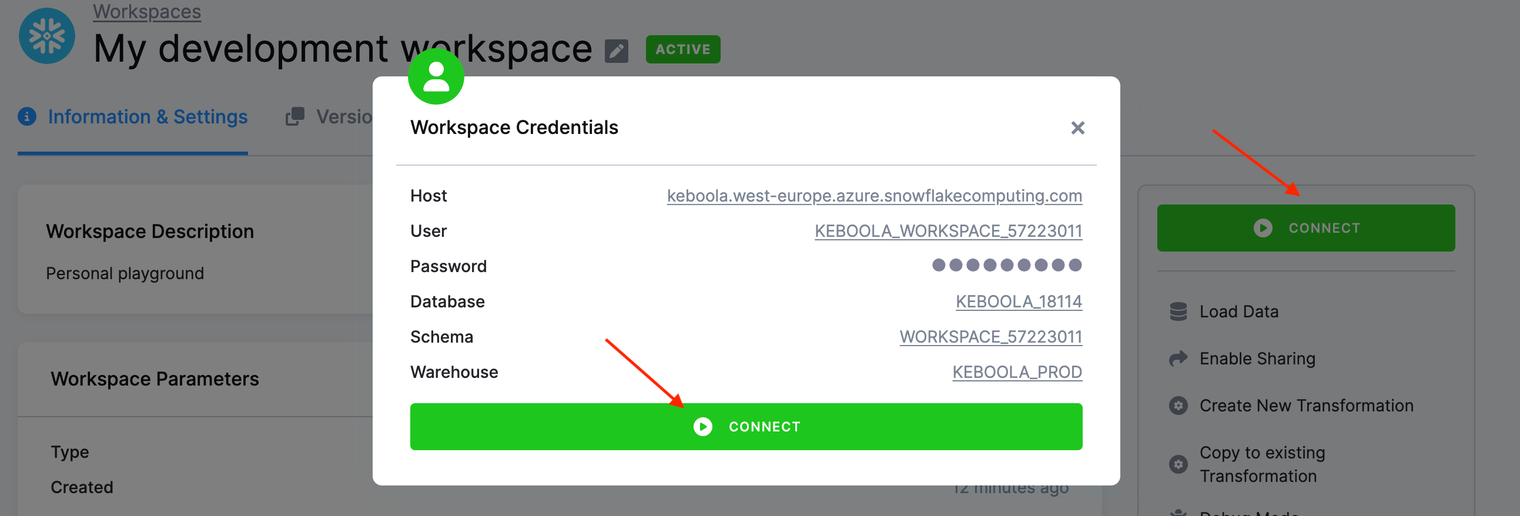
Click Connect. You’ll see the credentials you can use to connect to the workspace using any of your preferred IDEs. Alternatively, click the Connect button again to access the Web-based Snowflake SQL IDE (please note that this only applies if your project uses a Snowflake backend).
After completing the development of your queries, you can then copy and paste them into a transformation configuration, as we did in the [previous tutorial step])/tutorial/manipulate/).
What’s Next
Proceed to Writing Data for the next step in the tutorial.
If You Need Help
Feel free to reach out to our support team if there’s anything we can help with.