Prepare Table-Manipulating Configurations
In this part of our tutorial about development branches, you will prepare component configurations that manipulate tables and buckets in Storage. We will use those configurations in the following sections to see how branches work.
You can create a configuration of any component in a branch, and the following steps are not strictly necessary – you can use branches in a completely empty project. However, the tutorial follows the typical scenario when you are using branches in a non-empty project.
Prepare Production Configurations
Let’s start with a data pipeline that pulls data about bitcoin prices and creates a list of top five days when the price was the highest. You will prepare the production configurations, so that you can try working with branches later.
Start by pulling the bitcoin data. To simplify this, you can download a prepared CSV file using the HTTP data source connector.
Set Up Connector
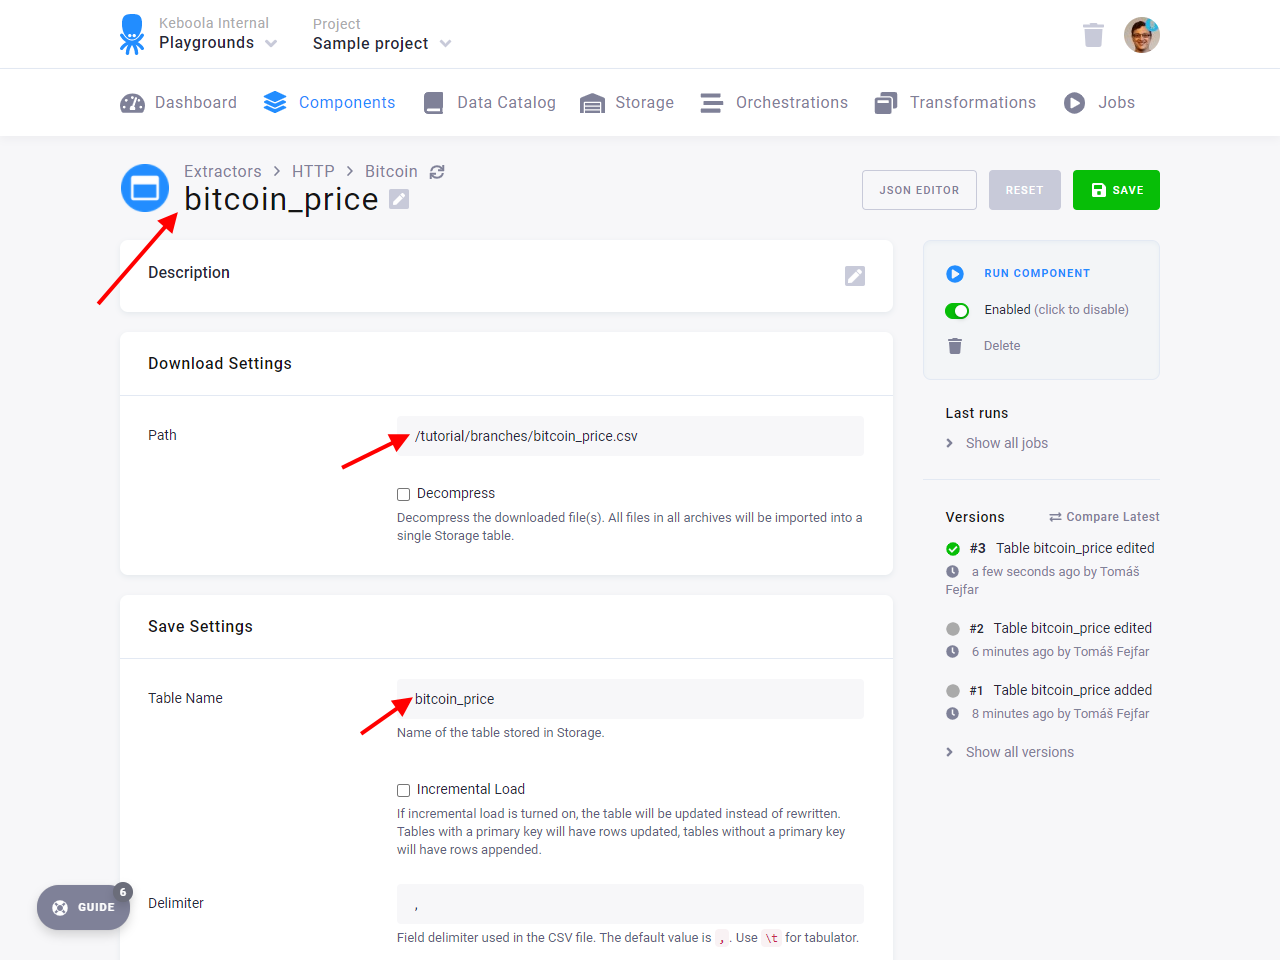
Create a new HTTP connector configuration. Fill in Base URL
to https://help.keboola.com. Then add a new table to the connector, named bitcoin_price, and fill in the Path
to /tutorial/branches/bitcoin_price.csv. Table Name should be bitcoin_price.
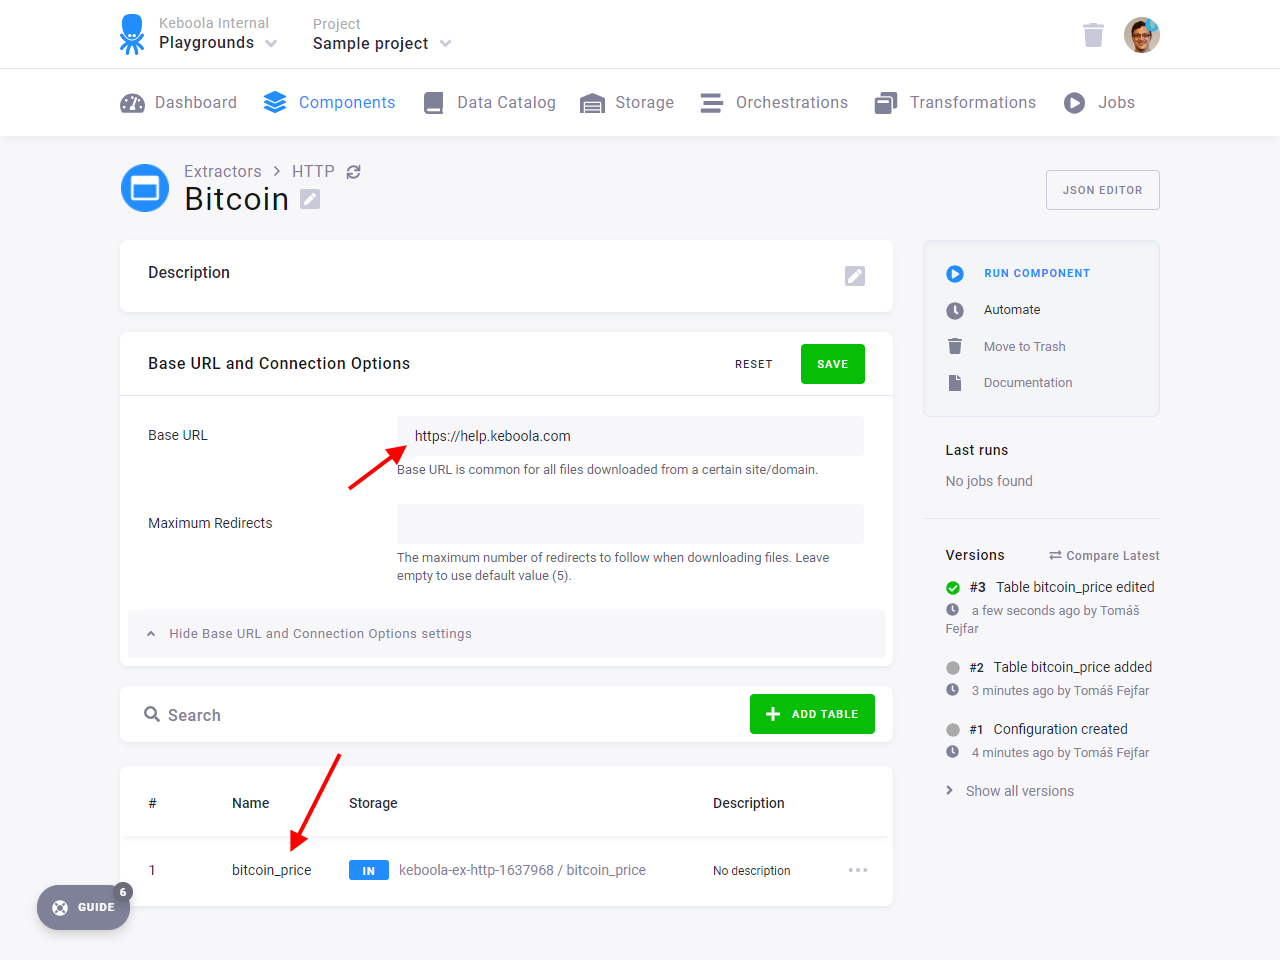
Run the connector, and verify that a new table in.c-keboola-ex-http-682373219.bitcoin_price was created.
Note: The number in your bucket name represents the configuration’s ID and will be different from what you see on the screenshot.
Set Up Transformation
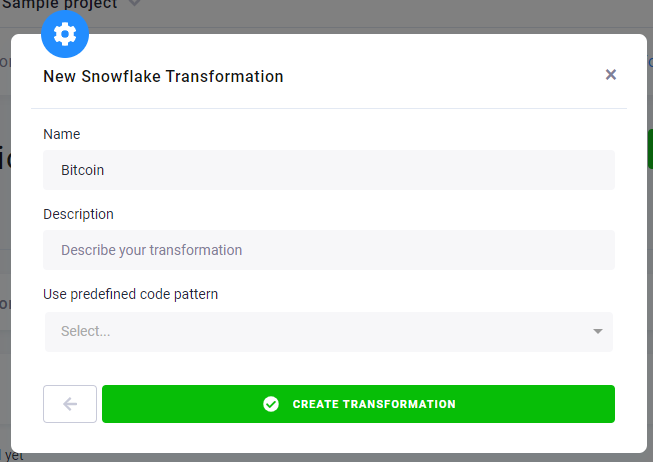
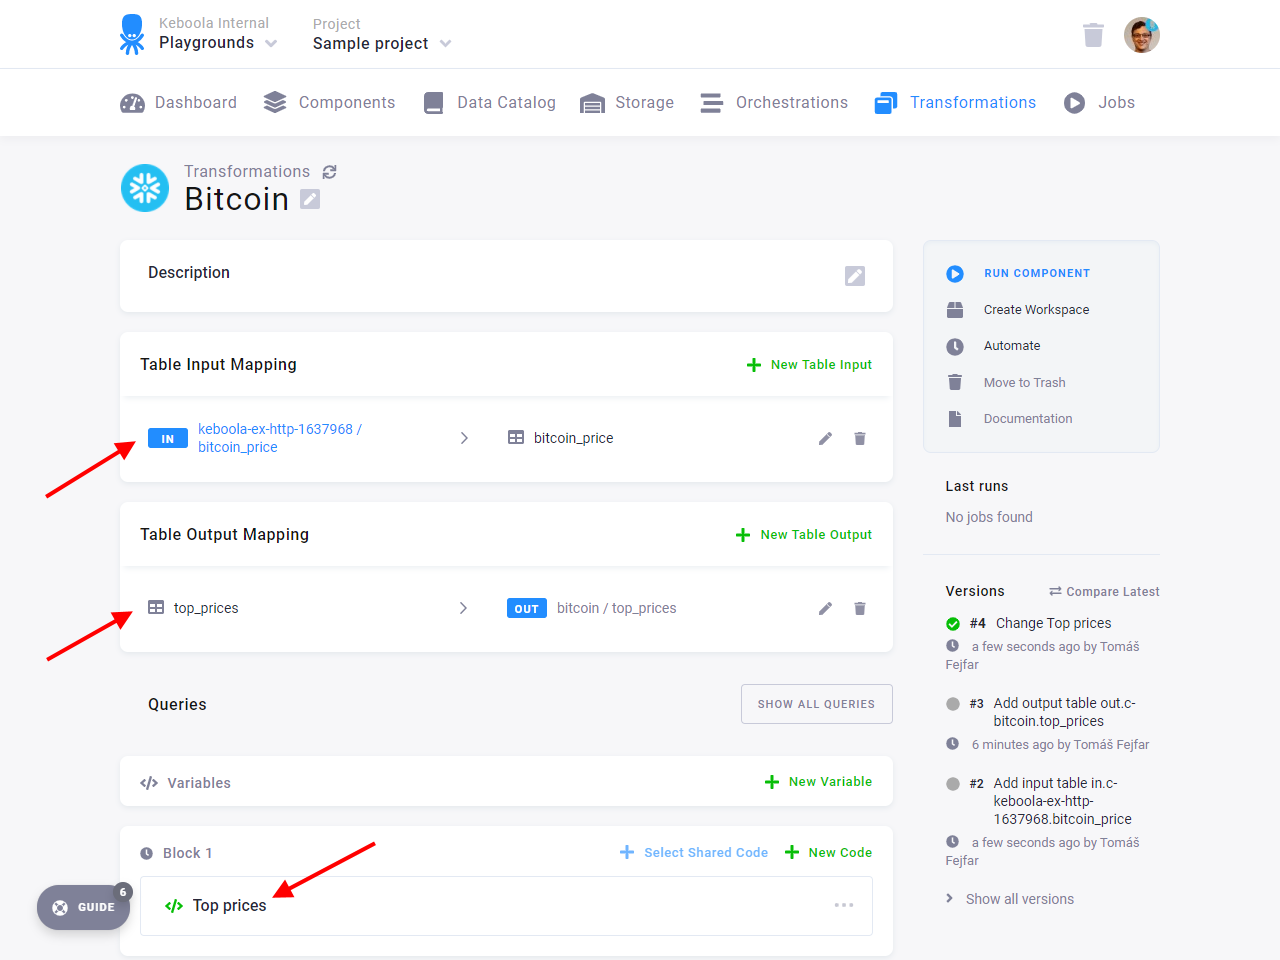
Create a new Snowflake transformation named Bitcoin.
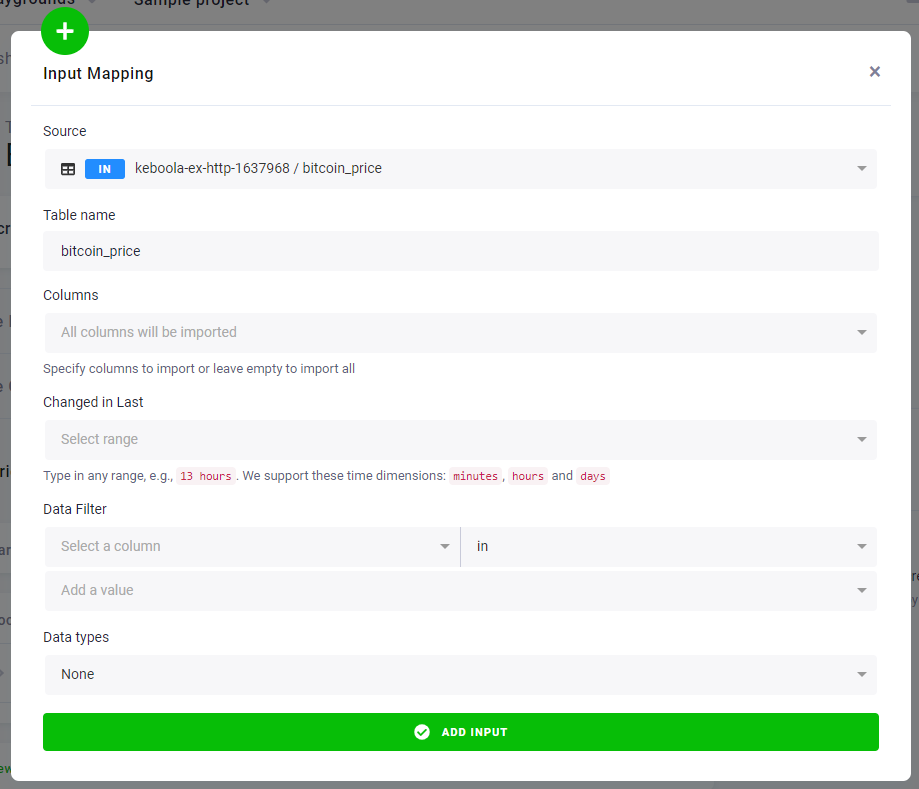
In the Table Input Mapping section, fill in the table bitcoin_price that you created by running the HTTP connector.
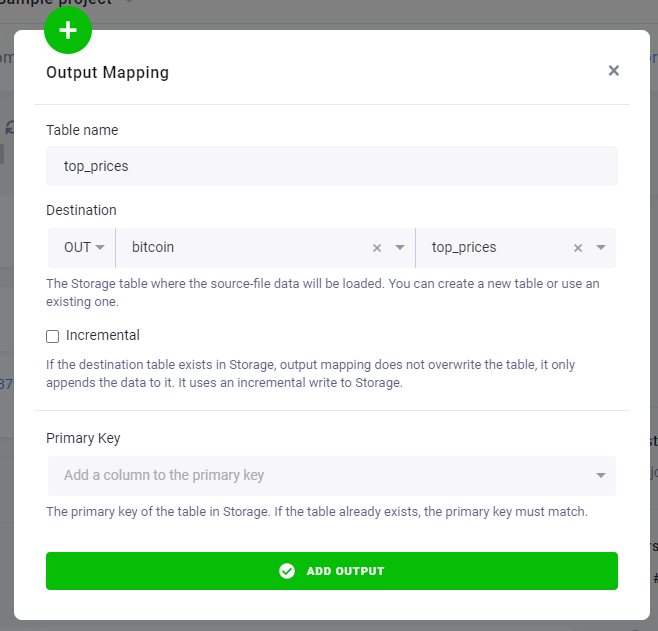
In Table Output Mapping, add a table top_prices that will be created in the transformation.
Finally, add a new code to Block 1 named Top prices with the following query:
CREATE TABLE "top_prices" AS SELECT * FROM "bitcoin_price" ORDER BY PRICE DESC LIMIT 5;

ALTER TABLE "top_prices" DROP COLUMN "_timestamp";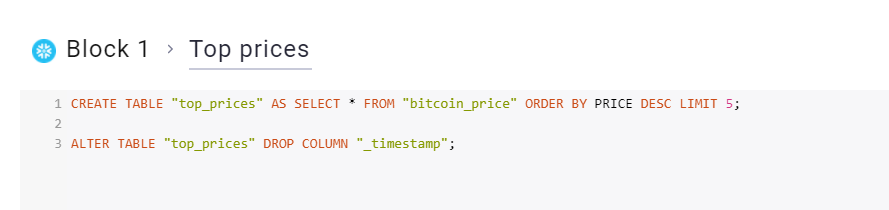
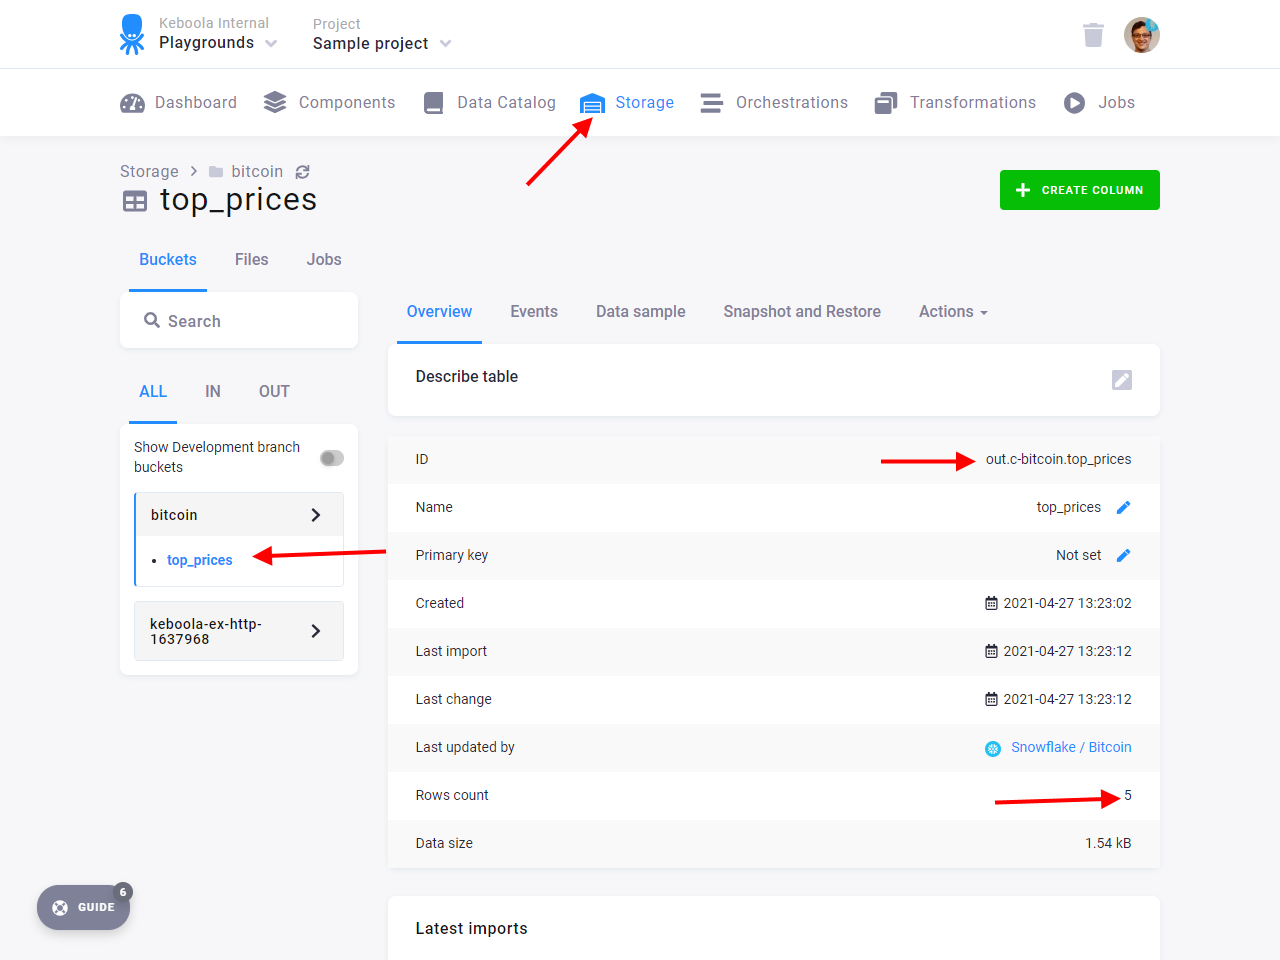
Save the transformation and run it. Then verify that there is a new table out.c-bitcoin.top_prices containing
five values from the source data – dates and amounts from when bitcoin had the most value.
Now you have the production set up. In the next section of our tutorial, you’ll set up a Python transformation using file storage. After that, you can give the branches a test run.