- Home
- Keboola Overview
- Getting Started Tutorial
-
Components
-
Data Source Connectors
- Communication
- Databases
- ERP
-
Marketing/Sales
- Adform DSP Reports
- Babelforce
- BigCommerce
- ChartMogul
- Criteo
- Customer IO
- Facebook Ads
- GoodData Reports
- Google Ads
- Google Ad Manager
- Google Analytics (UA, GA4)
- Google Campaign Manager 360
- Google Display & Video 360
- Google My Business
- Linkedin Pages
- Mailchimp
- Market Vision
- Microsoft Advertising (Bing Ads)
- Pinterest Ads
- Pipedrive
- Salesforce
- Shoptet
- Sklik
- TikTok Ads
- Zoho
- Social
- Storage
-
Other
- Airtable
- AWS Cost Usage Reports
- Azure Cost Management
- Ceps
- Dark Sky (Weather)
- DynamoDB Streams
- ECB Currency Rates
- Generic Extractor
- Geocoding Augmentation
- GitHub
- Google Search Console
- HiBob
- Mapbox
- Papertrail
- Pingdom
- ServiceNow
- Stripe
- Telemetry Data
- Time Doctor 2
- Weather API
- What3words Augmentation
- YourPass
- Data Destination Connectors
- Applications
- Data Apps
- Development Branches
- IP Addresses
-
Data Source Connectors
-
Templates
- Advertising Platforms
- AI SMS Campaign
- Customer Relationship Management
- DataHub
- Data Quality
- eCommerce
- eCommerce KPI Dashboard
- Google Analytics
- Interactive Keboola Sheets
- Kai PromptLab
- Kai SQL Bot
- MailChimp
- Media Cashflow
- Project Management
- Repository
- Social Media Engagement
- Surveys
- UA and GA4 Comparison
- Data Catalog
- Storage
- Orchestrations
-
Transformations
- Mappings
- Workspace
- Variables & Shared Code
- dbt Transformation
- Python Transformations
- R Transformations
- Snowflake Transformations
- BigQuery Transformations
- Redshift Transformations
- Synapse Transformations
- Exasol Transformations
- Teradata Transformations
- Oracle Transformations
- Code Patterns
- Legacy Sandbox
- Legacy Julia Transformations
- Legacy OpenRefine Transformations
- Legacy Python Transformations
- Legacy R Transformations
- Legacy Redshift Transformations
- Legacy Snowflake Transformations
- Transformation Migration
- Management
Looker
This data destination connector pushes data to your Looker instance where it creates a new LookML project. The column names are changed so that Looker can automatically understand data relations. The connector currently uses Snowflake as its backend.
Configuration
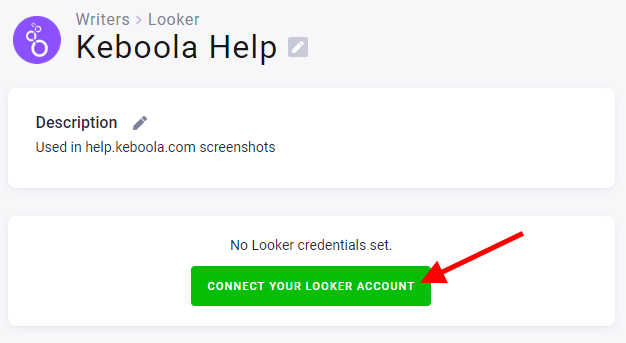
To connect Keboola to your Looker account, you need API credentials from Looker administration.
The exact required steps are described in the Looker documentation.
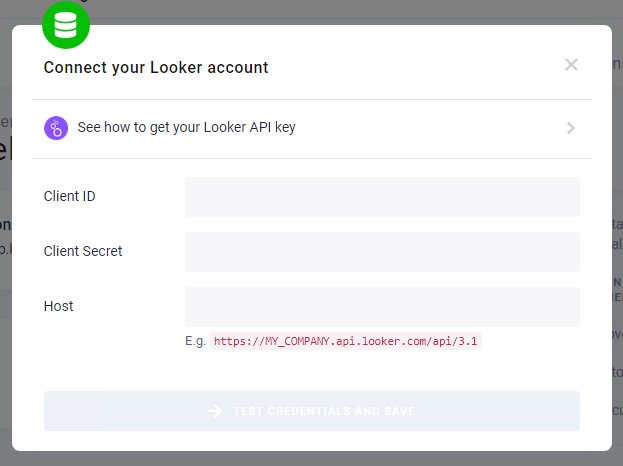
You need Client ID and Client secret to authenticate Keboola with Looker.
Create a new Looker data destination connector configuration in your project.
Continue by setting up a Snowflake workspace to use with Looker. You can either supply your own or use a Keboola generated workspace.

When your workspace is set up and tested, go back to the configuration. The next step is to set up your Looker credentials.
Fill in the client ID and the client secret you obtained from Looker.
Now the preparation phase is done and it’s time to set up the data you want to make available to your Looker project. Add tables to the configuration as needed. For further information, refer to the Snowflake data destination documentation.
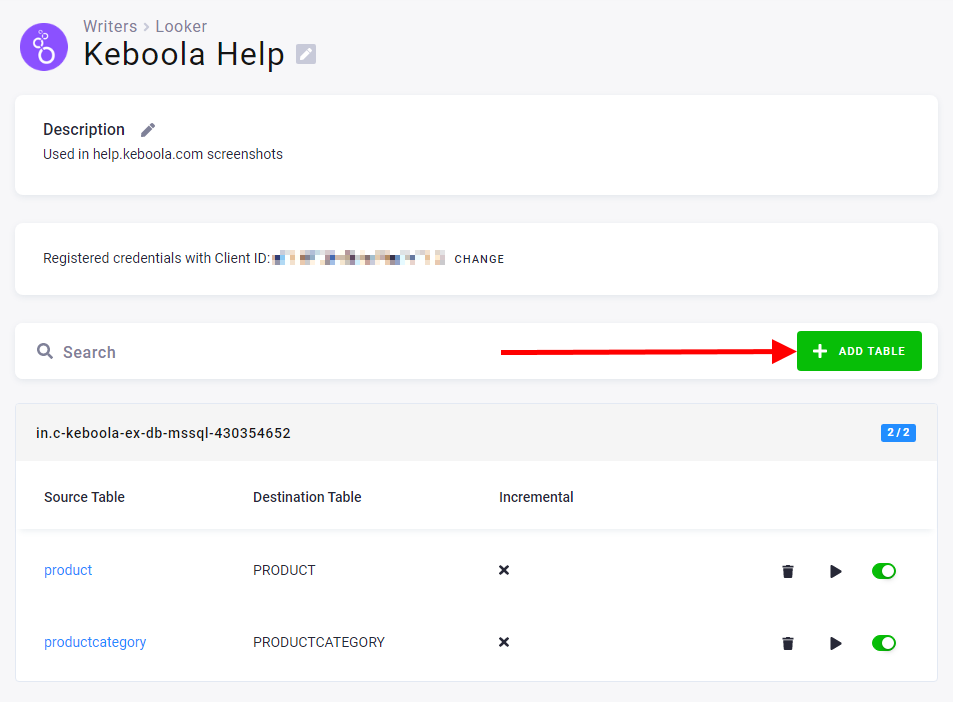
Each table you add can have relations set up. For that the dependent table needs to have the primary key set up.

When you click “Set Foreign key”, you can select to which table’s primary key should the foreign key point to.

The column is renamed upon saving (this is required for Looker to understand the relation automatically) and the FK badge is shown next to it.

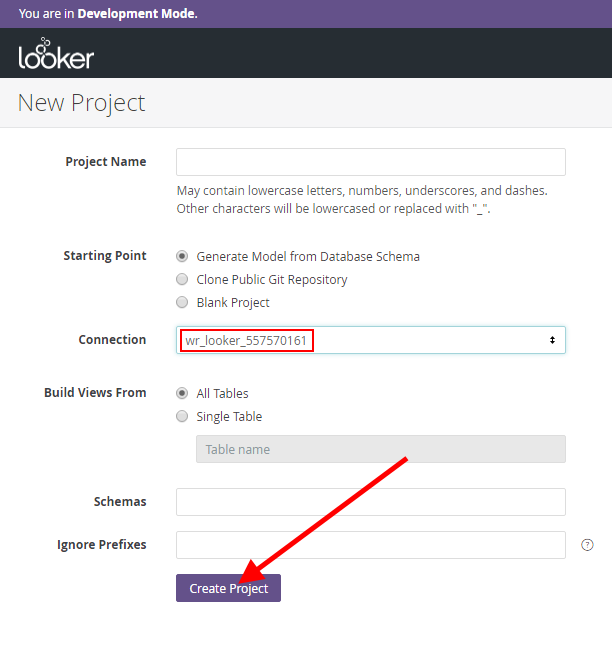
When you run the configuration, you’ll see the connection name in the log.
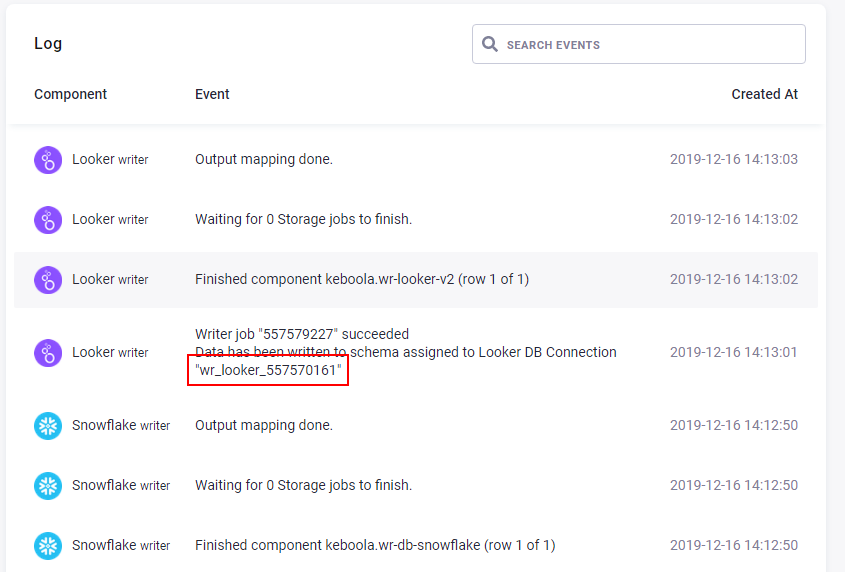
In Looker, when creating a new LookML project, you select the connection name from the configuration log.
You’re done. The LookML project with automatically created relations is prepared for you.
© 2024 Keboola